Monday 31 March 2014

The Happy Couple

I decided to make a Wedding card for my stash as it seems there is a new Wedding season approaching...
Not just a wedding season influenced by the time of year...but  a wedding season influenced by this time of our lives.
About a third of the people up at the lake are already retired. Sadly, there have been some who have passed away. Now we are seeing some new marriages...what fun! It is very social up there...lots of activities and social events. Some of our seniors have lost a partner and eventually gone on to remarry another camper!
This card is for my Wedding stash as methinks there well may be another wedding upcoming!


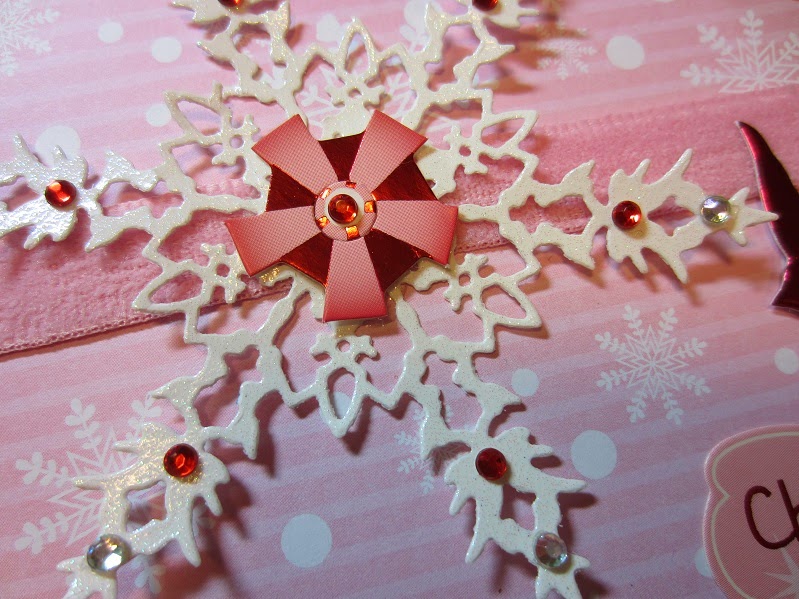
And a closer look at that flower...


Card recipe:
Card and Base - brought back from England last August
DP - First Edition Bird Song (green leaves); gunmetal black polka dot snippet from my stash (long separated from the ID strip!
Card stock - snippets of aqua textured, pearlized  card
Ribbon - snippet of ribbon from a birthday gift received from a lovely blogging friend (you know who you are sweetie)
Twine - snippet of fine silver twine used to tie the bow in place onto the ribbon strip
Image - Wild Rose Topper, Love and  Weddings
Flower - Layers of a pulled apart silk hydrangea and topped with a crocheted rose cut freed carefully from an old vintage doily

I am entering this card in the following challenges:
1.  Pixies Crafty Workshop - must use snippets
2. Two Peas in a Bucket - March Moodboard Challenge

Saturday 29 March 2014

Christmas Card Club - Cute Christmas

I am dedicating this post to Lorraine, who chose the "Cute Christmas"  theme for this fortnight.
I am so glad we will be all making such cute and cheery cards as Lorraine has left us...hopefully, only for a short time.  Hope you see these posts Lorraine and have a wee smile at the barrage of cuteness!

Around the middle of January 2013, my local scrapbook store had a 75% off Christmas sale. I picked up a set of stamps and matching dies. This little fellow was one of them!   I thought he would look cute on a card or a tag.

I had some snippets of Studio Calico Take Note that looked like the pattern of an igloo and some other random snippets in the colours of the March Moodboard at Two Peas in a Bucket. So I decided to stick with that colour scheme for my card. It was fun as it helped speed up the selection process....sometimes I can get bogged down choosing. lol

I inked up the edges of the DP with some black ink, and then added a snippet of Prima Devine to which I added a  K&Co black glittered border (leftover from a wedding album I made last year).  I placed my stamped and diecut penguin over the border and tucked the sentiment up in the top right.

I had some 3D tree cut out from a RAK I won. I used them to tie in the green shades from the moodboard. They are a bit brighter than the moodboard but they work for me.  I balance the card with a flurry of snowflakes from Inkadinkadoo. I stamped them with versamark and embossed them with a silver EP. I felt like it looked bare so I looped some fine silver card and glued it on top of the snowflake image.  A K&Co snowflake from my stash, hid the glue.

I used a bunch of varying colours and sizes of blue diamonds to highlight here and there.
Here is a photo of the inside...

Recipe:
Card base and envelope - from my stash
DP - snippets of Studio Calico Take Note from my stash, and a thin strip of Prima Devine for the bit under the border. Green dotted paper is an  unknown snippet
Border - K&Co black glittered border
Bling - blue diamonds from my stash
Cord - fine silver cord from my stash
Stamps - Iinkadinkadoo Snowflakes; Sizzix Penguin stamp
Die cut- Sizzix Penguin, Spellbinders snowflake (inside)
Sentiment chalkboard - Heidi Swap
3D tree stickers - Doodlebug


I am entering this card in the following challenges:
1. Pixies Crafty Workshop - must use snippets
2. Crafty Hazelnuts Christmas Challenge Extra - must be Christmas, anything goesl
3. Crafty Hazelnut's Patterned Paper Challenge - must cover card front with paper
4. MFP Speedy TV  Christmas Card Challenge - must be Christmas
5. Two Peas In A Bucket - March Moodboard Challenge
6.. Christmas Card Club - Cute Christmas

Tuesday 25 March 2014

Rudolph Day - March 2014

Yep, it's that time again. Time to make two Christmas Cards and drop by Sarn's blog, Stamping for Pleasure. On the 25th of each month, Sarn sponsors Rudolph Days. You have from the 25th untill the end of the month to link up two Xmas cards.  You can have two photos on your post or showcase both cards on one photo...whatever you chose...but both cards have to be on the same post!

My first card is designed to suit the March Moodboard at Two Peas In a Bucket. The colours this month are soft and sort of dreamy. Checked my stash and found these snippets of EP Tis the Season for the background papers and set them onto a pretty textured and pearlized aqua card stock mat.. They were not quite big enough so I fitted a scallopy  K&Co grey border piece to fill the gap. I quite like the look of it so must remember to mimic this look in the future. Now, I'm not good at remembering, so I might need reminding!!!

The quote is from a Project Life sheet of quote cards,  that I double matted with auqa and teal textured and pearilized cardstock. Two K&Co silver and white snowflakes and two aqua glittered foam snowflakes finished off the design. The bottom snowflake seemed too small, so I tucked a dollar store shimmery fabric snowflake behind it. I have a drawer full of these and use them often. Sprinkled a few teensy diamonds here and there and it was done. Here is a close up of the layered snowflake...

In spite of my resolve to finish the inside of my cards as I make them, I am posting this card without that step. It has been a hellish couple of weeks and I just have not got down to the scrapbook room to finish it yet. I will get it done before shelving this card.

I am entering this card in the following challenges:
1. Rudolph Days - must be Christmas
2. Crafty Hazelnuts Christmas Challenge Extra - must be Christmas
3. Pixies Crafty Workshop - must use snippets
4. MFP Christmas Card Challenge - must be Christmas
5. Holly Jolly Christmas - Bingo, mine is Blue, free  and snowflakes

My second card is from a crafty day with my neighbour, Lisa. I do not have manufacturer names for this one as it was her day to design and make the card kit. I am really happy with it and loved her design and paper/embellishment selections. This was a fun card to make as it is so feminine and girly! I think I will give it to my girlfriend that has lost her husband. She will totally enjoy the girlyness of it!


We created diamond corners with some row of mini diamonds that Lisa had in her stash . I quite like the look of them.  The sticker in the center of the snowflake and also the dove, are from the same manufacturer. The embellishments were a combination of mat and mirri card. The dove was a wee bit marred (as can happen with mirri) so I added three tiny red diamond to hide the wee scratchy mark! The pink ribbon is a velvet one and provides a texture contrast between the  sheen of the mirri and the diamond glitz of the glittered outer piece of card.


I did manage to finish this one...but you will have a chuckle over how I did it...Yes, Yes, I know that the finished pieces usually go on the bottom half of the inner card. Somehow I managed to dent the card itself, so I used the extra paper to cover up that booboo. Luckily Lisa had those pretty sentiment dies for the bottom half. I will use a rub-on for the sentiment on the die.

No recipes tonight, as I have already given you the info already for the first card and have no info for the second!

I am entering these cards in the following challenges

1. Rudolph Day - must be Christmas
2. Crafty Hazelnuts Christmas Challenge Extra - must be Christmas
3. Pixies Crafty Workshop - must use snippets
4. Marks Finest Papers Christmas Card C|hallenge - must be Christmas

Saturday 15 March 2014

Christmas Card Club - Feature Wings

It is Christine's @ Christine's Cards and Crafts turn to chose a theme for our fortnightly Christmas Card club. She chose Winged Creations and this one was really fun!

I am off to my Mum's house tomorrow, so needed to make my card ahead and auto schedule it...hope it works! This card was made at my weekly craft day with my neighbour....we made 3 cards and had a lot of fun. I made sure I added a winged creature as I had my looming club commitment in mind.

DP is Bella Blvd, Winter Wonder Blizzard...I quite like those multi-coloured snowflakes. Added another layer of what I think is MME blue dotted DP,  after carefully wrapping a snippet of dotted ribbon around it.

Lisa and I are good friends so she called the night before and asked me to cut some large glitter paper snowflakes...so these are Memory Box snowflakes. The gorgeous jewel in the center is from a package of jewels  that Lisa had in her stash. The little snowflakes are random ones from packages that have long since lost their labels. I added the wee owl embellishment as my "wings" commitment item and added the word JOY beside it. Joy is another ready cut embellishment from Lisa's stash.

Since I thought it all looked a little too plain, I added some small blue diamonds and tried to place them on every other snowflake tip and then placed the remainder a bit further down the flake. Couple more red diamonds on the sides and the front was done.


Inside is a sheet of matching card and a sentiment I cut off one of the Chritmas cards we received last year! I added a banner flag to tie in the DP from the front. I will skip the recipe as I have already listed all the ingredients in this post!
Here is a close up of the snowflake.

I am entering this card in the following challenges:
1. Pixies Crafty Workshop - must use snippets
2. Crafty Hazelnuts Christmas Challenge Extra - Anything goes, as long as it is Christmas
3. Crafty Hazelnuts Patterned Paper Challenge - must cover card front with paper
4. Completely Christmas Challenge # 3 - Anything (Christmas) Goes

Monday 10 March 2014

It's a guy thing

At one of our weekly craft days, it was my neigbour's turn to design the the card. I think she aced it with this great masculine card!

My card kit envelope contained a corrugated card, a piece of glittered silvery and gold paper, a piece of coppery Miri card, a decoupaged motorcycle image and a piece of fine silver stretchy cord.

This was a fun card to make. The stretchy cord was a great idea as you can tie a bow or a knot and still get it nice and tight. I am going to watch for something similar as it was so easy on my hands to tie a bow with this cord.
Here is a closeup of the decoupage...


This card will be perfect for a friend of ours who led the motorcycle division when he was in the police force.

I have left the inside blank as I am not sure the occasion I will use it for. The retired policeman friend has house parties a couple times a year and visit us up at the lake for a few days. I may keep it just as a note card or thank you note...Or may save it for his birthday.

I have been pretty good about finished the inside of about 95% of my cards. It has been made a bit easier as I generally know who I am going to give a card to and for what reason. That really helps plan what to put inside.
For the ones that are unknown, I have stamped a little drawer full of sentiments. I have done a few of my fave Birthday, Thank You and Hello sentiments in the three common colours of card I generally make...white, cream and of course kraft. That way, once I decide what I want to use the card for, I can just grab one and glue it down. I try to leave a couple of snippets of the front DP inside the card before I place it in the plastic sleeve. I can then use those when I add that sentiment.

This is an auto scheduled post as I will be up at Mum's and have very little access to the internet. I will return all comments once I am back home!

I am entering thos card in the following challenges
1. Pixies Crafty Workshop - must use patterned paper
2. Crafty Hazelnut's Patterned Paper Challenge - must cover your card with paper

Wednesday 5 March 2014

Peonies and Friends

Here is another of the cards from my weekly paper crafting days with my neighbour. It was her turn to make the page kits and I think she aced it with this card!

The week before when we had lunch and crafted at my house, she asked to use my Big Shot and some Memory box Dies. I did not pay too much attention to what she was doing, as she is a scrapbooker and a card maker and I just though she was cutting some items for herself. I was busy working on my cards and didn't even glance over to see what she was cutting.

Well, it was the dies for this card! Didn't she surprise me! This was a quick and fun card to make. It was just a matter of grab, cut, punch, glue and done...loved it. I am one of those people that takes forever to make a card. I am one of those people sho take forever to make a card. I often overthink and overwork elements on my card. She is a great card making foil, as she is quick, decisive and glues and moves on!
The only thing we did that took an extra minute, was inking the background of the peony with some pink chalk ink. We then went over it with a clear Wink of Stella pen...two minutes tops!
Perhaps you can see a bit of that shimmer here...

When we started our card kits and lunch sessions, we agreed that the cards we made would be quick and easy. Both of us agree that it has been such fun thinking of cards to create, and then making up the kits. This endeavor is really helping me to fill up my finished card boxes and for that I am so grateful.

Recipe:
Card and Envelope - from Lisa's stash
DP - Graphic 45 paper pad
Card Stock - snippets of textured cream card for the flowers
Dies Memory Box, Lovely Peony Outline and Background; Memory Box Lavish Branch
Bling - from Lisa's stash
Stamp - from Lisa's stash
Punch - from Lisa's stasht

I am entering this card in the following challenges:
1. Pixies Crafty Workshop - must use snippets
2. Crafty Hazelnut's Patterned Paper Challenge - must cover card with paper

Sunday 2 March 2014

Christmas Card Club - Feature a Robin

Here is the third card I made from the banner card kits I made up for the weekly craft day with my neighbour.  For this card I needed to feature a Robin as that is the Christmas Card Club theme chosen by Margaret at dutchess .

I used some of the Simple Stories 25 Days Of Christmas papers that I received from the lovely Aliwinn. After she made her 2013 Xmas cards, she posted a RAK on the Two Peas blog and gave away a huge box of her left over items. I won! Here is a photo of my wonderful package. There were papers, embellishments, stamps, a stencil, trimmings and much, much, more.


They have a lovely country, rugged feel...perfect for distressed cards and cards with a decided masculine feel. There are even papers for Project life type pages, or December Daily.

Here is the Robin card I made. I was on a bit of a roll to use up the last of the poinsettia images I had already coloured up. I used a K&Co 3D Robin and I think he fit the card quite well. I made him a little nest from some snippets of kraft card  and he Martha Stewart branch punch. I inked some of them up a bit and left others untouched to try and gain a bit of depth to the nest.

Here is a close up of the bird. I had to add a bit of red chalk to make him into a robin...he started this life as another type of bird...but was given the chance to evolve! lol

And finally the arty shot...You will have to take my word that the inside is finished...you can just see the edge of the sentiment. The shots Itook turned out too wonky to show you!


Recipe:
Card base - 5 inch square cream card from my stash
DP - Background is from a Heidi Swap 6x6 pad...I can't find the style name anywhere on it...
DP - Flag, PP mats are all Simple Stories 25 Days Of Christmas
Cardstock - Kraft snippets and red velvet card teensy snippets for the snowflake layers, from my stash
Punches - Martha Stewart snowflake and also her branch punch
Bling - cream pearls from my stash
Embellishment - K&CO 3D bird

I am entering this card in the following challenges:
1. Pixies Crafty Workshop - must use snippets
2. Crafty Hazelnut's Christmas Challenge Extra - must be Christmas
3. Two Peas In A Bucket - Christmas All Year Long - March
4. MFP Speedy TV Christmas Card Challenge - must be Christmas
5. Crafty Hazelnut's Patterned Paper Challenge - must cover card with paper
6. Christmas Card Club - must be Christmas and Feature A Robin